In this and in few upcoming articles, I am going to discuss how to perform CRUD operations using Entity Framework in ASP.NET MVC application. Please read our previous article where we discussed how to Delete Database Records in ASP.NET MVC Application with some examples.
Database Tables used in this Demo:
In this demo, we are going to use the following Department and Employee table. So, please use the below SQL script to create and populate these 2 tables
Create table Department
(
  Id int primary key identity,
  Name nvarchar(50)
)
Insert into Department values('IT')
Insert into Department values('HR')
Insert into Department values('Payroll')
Create table Employee
(
  EmployeeId int Primary Key Identity(1,1),
  Name nvarchar(50),
  Gender nvarchar(10),
  City nvarchar(50),
  Salary decimal(18,2),
  DepartmentId int
)
Alter table Employee add foreign key (DepartmentId) references Department(Id)
Insert into Employee values('Mark','Male','London',1000,1)
Insert into Employee values('John','Male','Chennai',2000,3)
Insert into Employee values('Mary','Female','New York',3000,3)
Insert into Employee values('Mike','Male','Sydeny',4000,2)
Insert into Employee values('Scott','Male','London',3000,1)
Insert into Employee values('Pam','Female','Falls Church',2000,2)
Insert into Employee values('Todd','Male','Sydney',1000,1)
Insert into Employee values('Ben','Male','New Delhi',4000,2)
Insert into Employee values('Sara','Female','London',5000,1)
Create a new ASP.NET MVC 5 Web application:
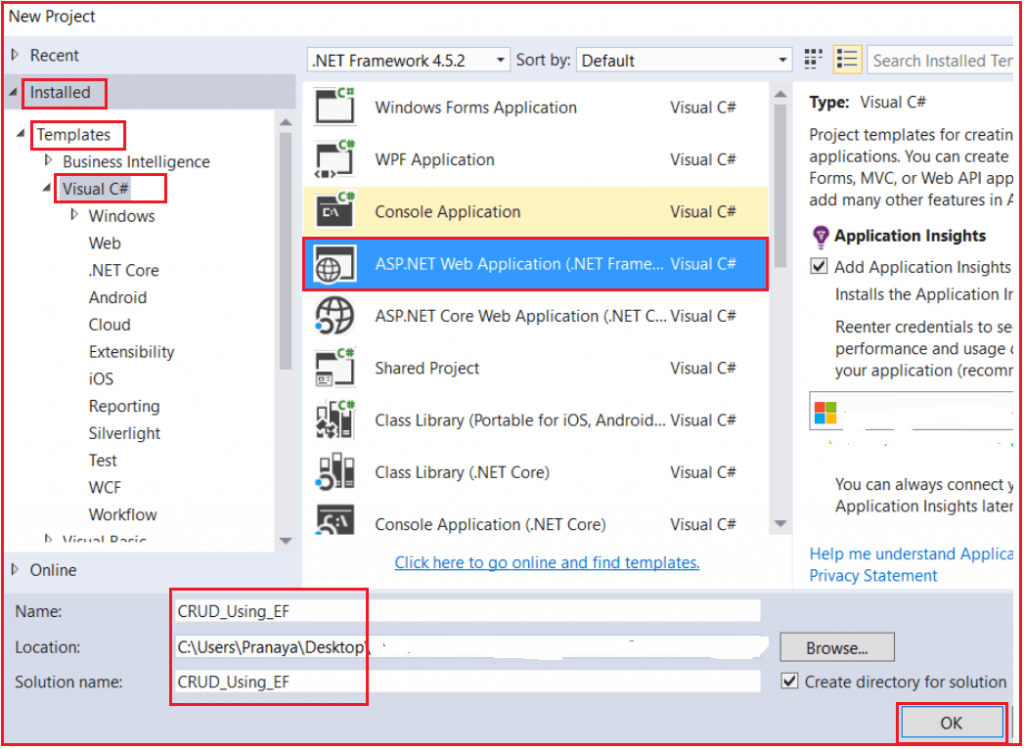
Open File => New =>Project and then select Installed => Templates => Visual C#. Then select ASP.NET Web Application. Provide the project name and location where you want to save your application and finally click on the OK button as shown in the below image.
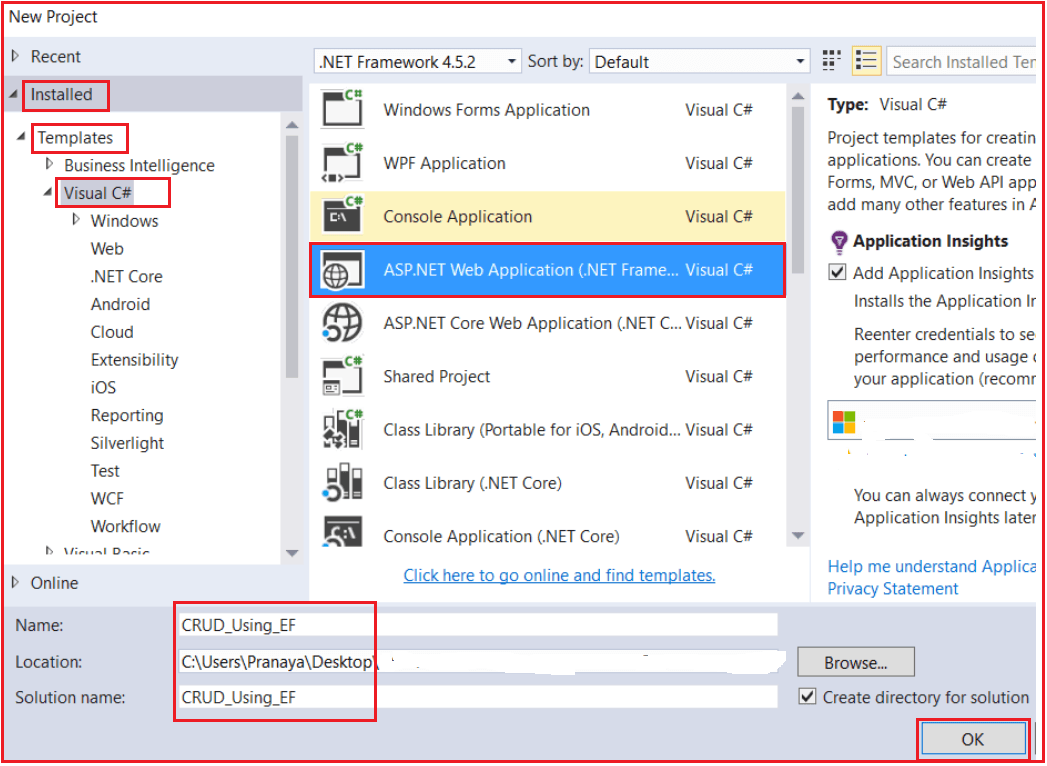
From the next screen that is from select a template screen, select Empty as the project template. From add folder and core reference section check the MVC checkbox and click on OK as shown below.
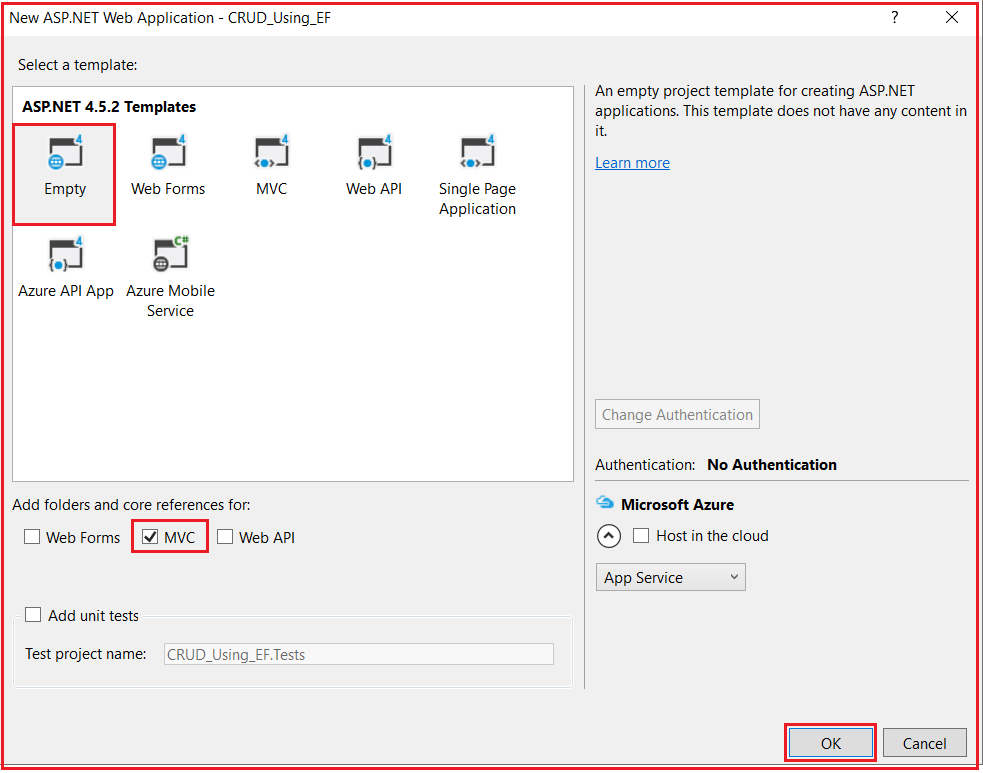
Once you click on the OK button, it will take some time to create the project for us.
Adding ADO.NET Entity Data Model
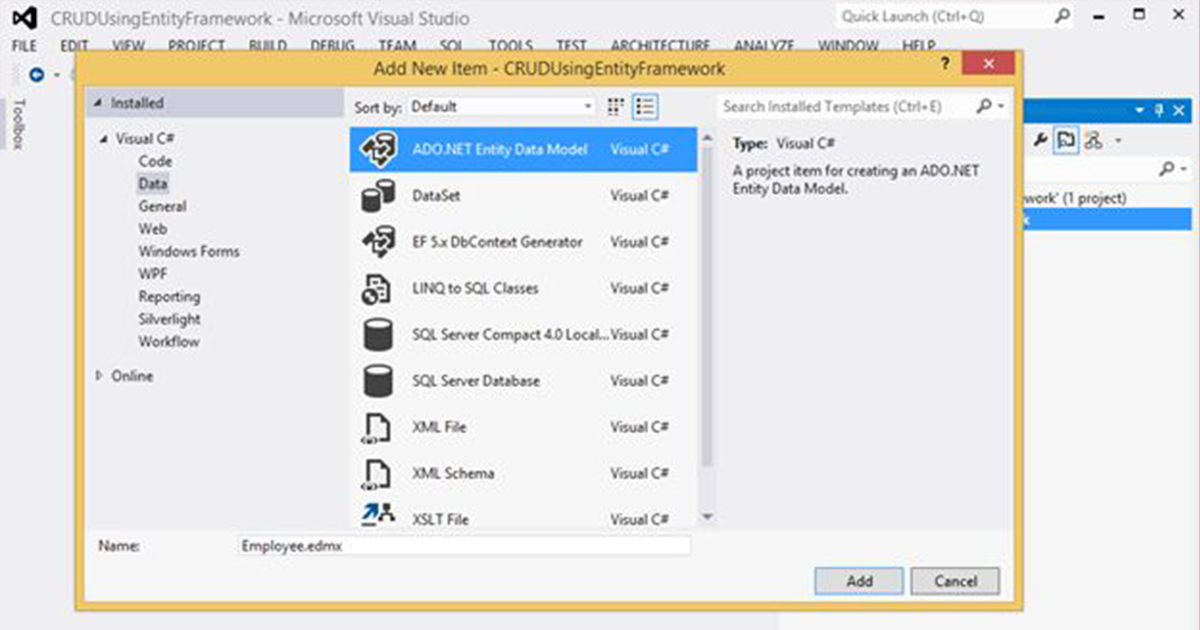
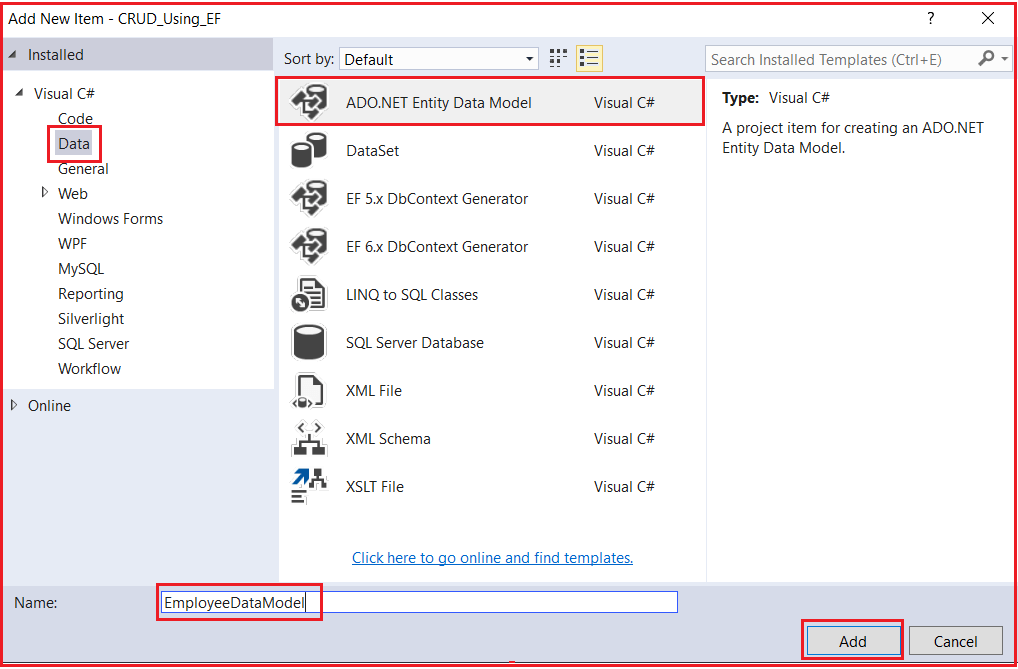
Right-click on Models folder then select Add => New Item from the context menu that will open the Add New Item window. Select the Data tab from the left panel and then choose ADO.NET Entity Data Model from the middle panel. Provide a meaningful name for your data model and click on the Add button as shown in the below image.
Selecting The Entity Framework Approach to interact with the database.
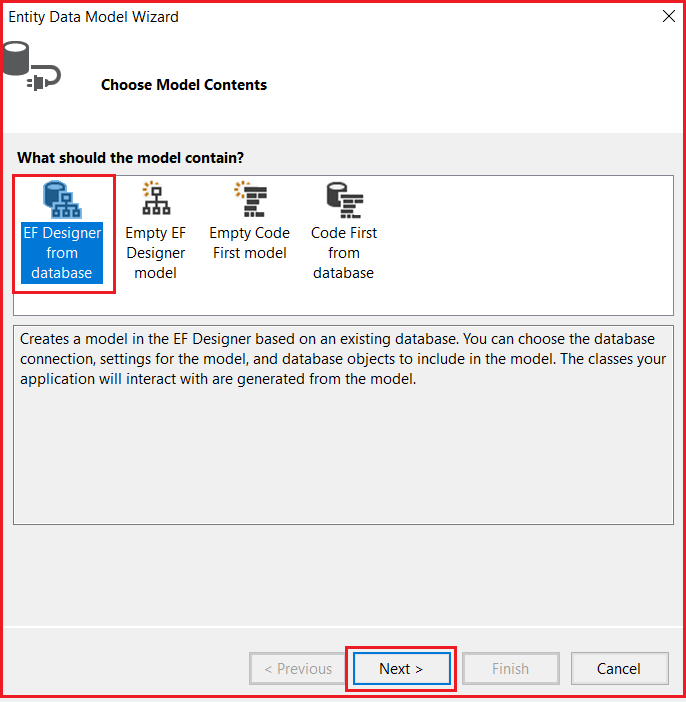
Once you click on the Add button it will ask you to choose the entity framework approach. Here, we are going to use the database first approach as we already created the required database tables. So, from the Entity Data Model Wizard, select “Generate from database” option and click “Next” as shown below.
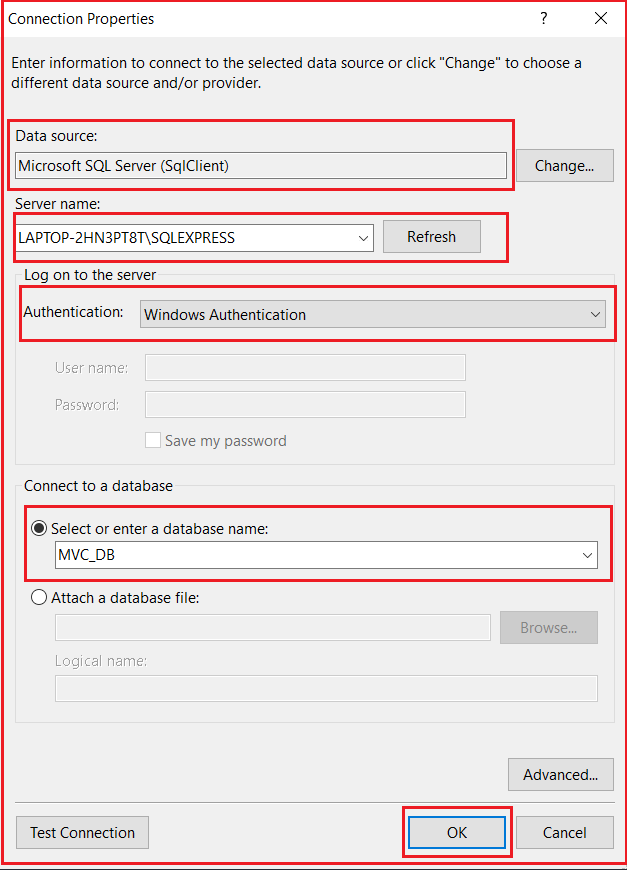
On “Choose your data connection screen” and click on the “New Connection” button which will open the connection properties window. Here, we are going to interact with the SQL Server database. So, from the Data Source select Microsoft SQL Server (SqlClient). Provide your SQL Server name. Choose the Authentication type. Here, I am choosing Windows Authentication. Then select the database to which you are going to interact from the select or enter a database name drop-down list. Finally, click on the “OK” as shown below.
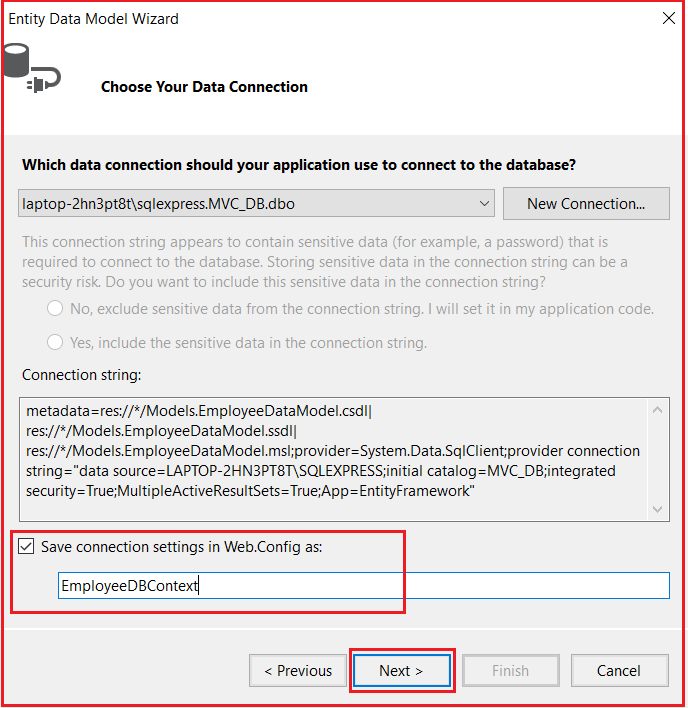
Then provide a meaningful connection string name such as “EmployeeDBContext” and click on the “Next” button as shown below.
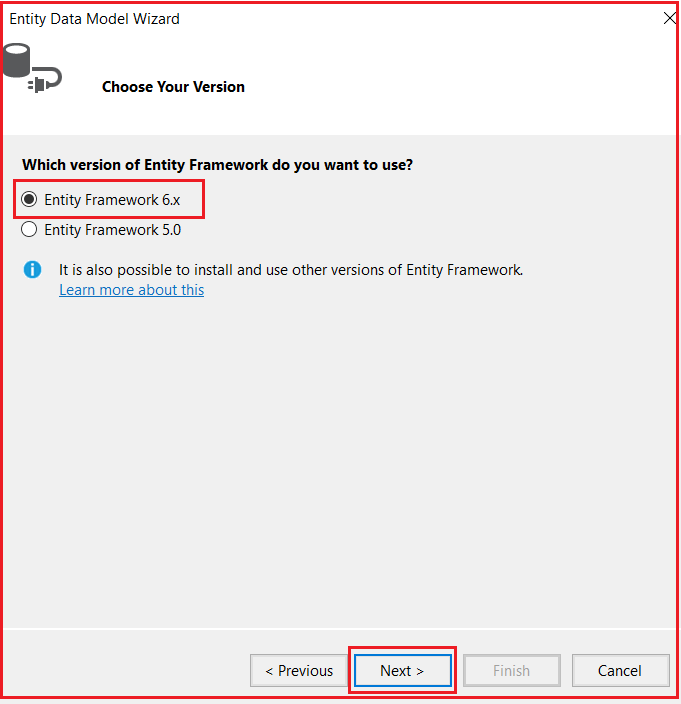
Choose Entity Framework Version:
Here, we are going to use Entity Framework 6. So, from the Choose Your Version screen, choose the Entity framework 6.x and click on the Next button as shown below.
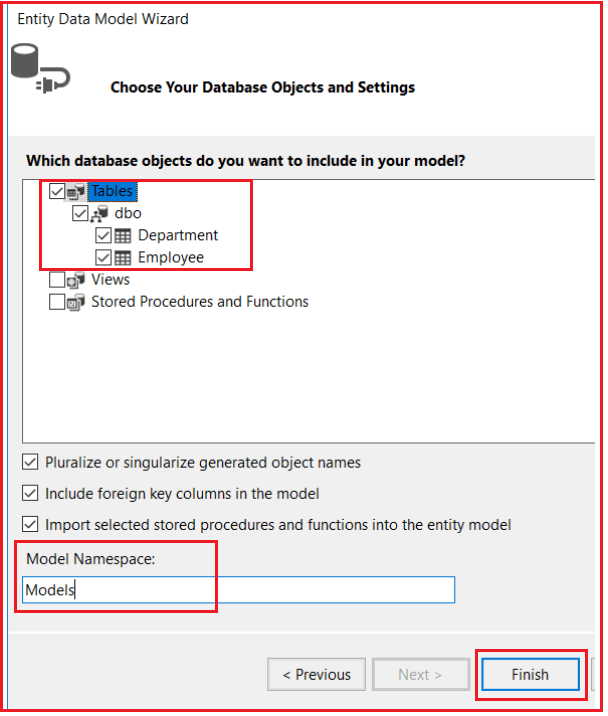
Selecting Database Objects and Settings:
On “Choose your database objects and Settings” screen, expand the “Tables” and then select “Department” and “Employee” tables. Set Model Namespace as Models and click on the “Finish” button as shown in the below image.
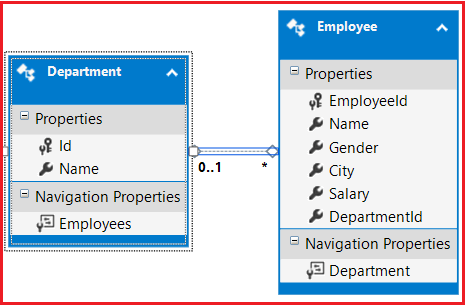
At this point, we should have Department and Employee entities generated as shown below.
Creating MVC 5 Controller:
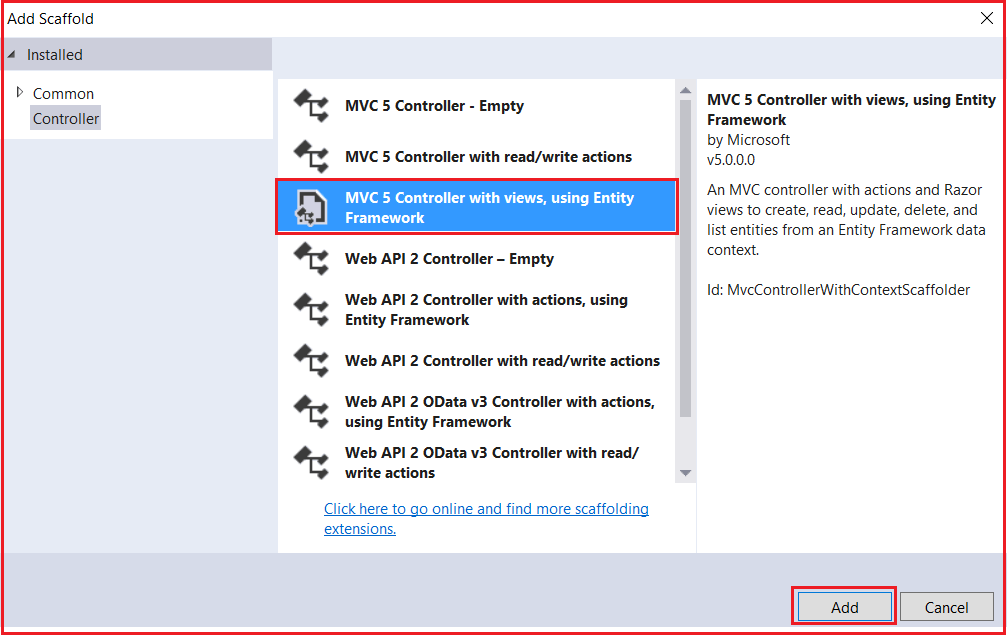
Right-click on the “Controllers” folder and select Add – Controller from the context menu. Then select MVC 5 Controller with views, using Entity Framework and click on the Add button as shown in the below image.
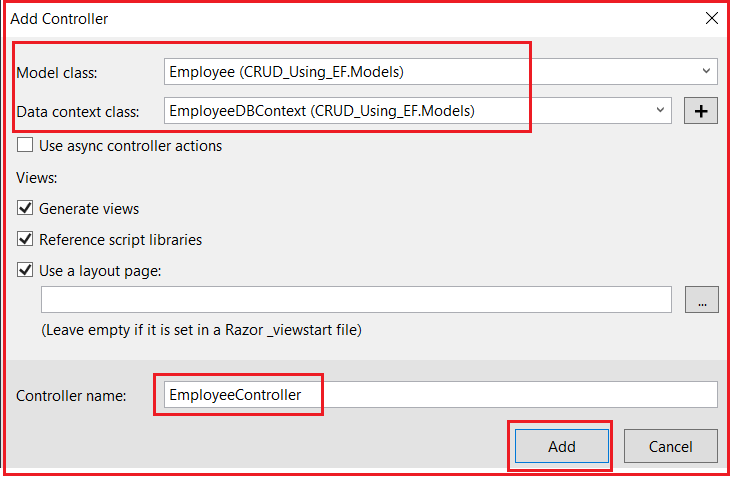
On the next screen set the below details
- Model class = Employee (CRUD_Using_EF.Models)
- Data Context Class = EmployeeDBContext(CRUD_Using_EF.Models)
- Controller Name = EmployeeController
- Rest values are as it is and click on the Add button as shown in the below image
At this point, we should have the following files automatically added.
EmployeeController.cs file in “Controllers” folder. Index, Create, Edit, Detail and Delete views in the “Employee” folder which is inside the Views folder.
Below is the EmployeeController code
namespace CRUD_Using_EF.Controllers
{
    public class EmployeeController : Controller
    {
        private EmployeeDBContext db = new EmployeeDBContext();

        // GET: Employee
        public ActionResult Index()
        {
            var employees = db.Employees.Include(e => e.Department);
            return View(employees.ToList());
        }

        // GET: Employee/Details/5
        public ActionResult Details(int? id)
        {
            if (id == null)
            {
                return new HttpStatusCodeResult(HttpStatusCode.BadRequest);
            }
            Employee employee = db.Employees.Find(id);
            if (employee == null)
            {
                return HttpNotFound();
            }
            return View(employee);
        }

        // GET: Employee/Create
        public ActionResult Create()
        {
            ViewBag.DepartmentId = new SelectList(db.Departments, "Id", "Name");
            return View();
        }

        // POST: Employee/Create
        // To protect from overposting attacks, please enable the specific properties you want to bind to, for
        // more details see http://go.microsoft.com/fwlink/?LinkId=317598.
        [HttpPost]
        [ValidateAntiForgeryToken]
        public ActionResult Create([Bind(Include = "EmployeeId,Name,Gender,City,Salary,DepartmentId")] Employee employee)
        {
            if (ModelState.IsValid)
            {
                db.Employees.Add(employee);
                db.SaveChanges();
                return RedirectToAction("Index");
            }

            ViewBag.DepartmentId = new SelectList(db.Departments, "Id", "Name", employee.DepartmentId);
            return View(employee);
        }

        // GET: Employee/Edit/5
        public ActionResult Edit(int? id)
        {
            if (id == null)
            {
                return new HttpStatusCodeResult(HttpStatusCode.BadRequest);
            }
            Employee employee = db.Employees.Find(id);
            if (employee == null)
            {
                return HttpNotFound();
            }
            ViewBag.DepartmentId = new SelectList(db.Departments, "Id", "Name", employee.DepartmentId);
            return View(employee);
        }

        // POST: Employee/Edit/5
        // To protect from overposting attacks, please enable the specific properties you want to bind to, for
        // more details see http://go.microsoft.com/fwlink/?LinkId=317598.
        [HttpPost]
        [ValidateAntiForgeryToken]
        public ActionResult Edit([Bind(Include = "EmployeeId,Name,Gender,City,Salary,DepartmentId")] Employee employee)
        {
            if (ModelState.IsValid)
            {
                db.Entry(employee).State = EntityState.Modified;
                db.SaveChanges();
                return RedirectToAction("Index");
            }
            ViewBag.DepartmentId = new SelectList(db.Departments, "Id", "Name", employee.DepartmentId);
            return View(employee);
        }

        // GET: Employee/Delete/5
        public ActionResult Delete(int? id)
        {
            if (id == null)
            {
                return new HttpStatusCodeResult(HttpStatusCode.BadRequest);
            }
            Employee employee = db.Employees.Find(id);
            if (employee == null)
            {
                return HttpNotFound();
            }
            return View(employee);
        }

        // POST: Employee/Delete/5
        [HttpPost, ActionName("Delete")]
        [ValidateAntiForgeryToken]
        public ActionResult DeleteConfirmed(int id)
        {
            Employee employee = db.Employees.Find(id);
            db.Employees.Remove(employee);
            db.SaveChanges();
            return RedirectToAction("Index");
        }

        protected override void Dispose(bool disposing)
        {
            if (disposing)
            {
                db.Dispose();
            }
            base.Dispose(disposing);
        }
    }
}
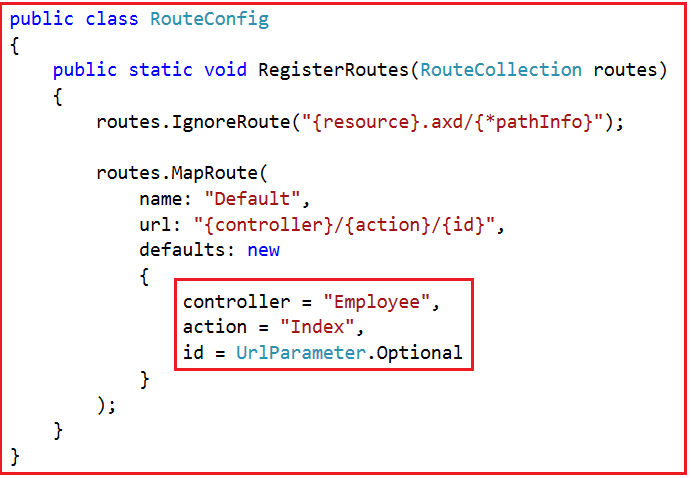
At this point if you run the application you will get an error stating – The resource cannot be found. This is because by default the application goes to the “Home” controller and “Index” action. To fix this, open “RouteConfig.cs” file from the “App_Start” folder and set the controller as “Employee” as shown below.
Run the application again. Notice that all the employees are listed on the index view. We can also create a new employee, edit an employee, view their full details and delete an employee as well. However, there are a few issues with each of the views which we will address in our upcoming articles.
In our next article, I am going to discuss what are the issues associated with the Index view and how will solve this. Here, in this article, I try to explain how to perform CRUD operations using Entity Framework in ASP.NET MVC application. I hope this article will help you with your needs. I would like to have your feedback. Please post your feedback, question, or comments about this article.

